Adjusting Damper Spoons in a Upright Piano
This article provides a detailed guide on regulating the dampers of vertical piano actions. Various techniques are described for regulating the pilot and aligning the dampers to the strings to achieve even movement. Additionally, it explains how to regulate the damper spoons to ensure synchronized movement of hammer and damper. The article will be useful for piano technicians specialized in maintenance and repair, as well as for piano owners who want to perform regulation themselves

This article is based on the writings of Danny L. Boone, a technical expert at Baylor University, and was presented by Jimmy Gold, President of the Texas Chapter of the PTG. The text provides valuable and informative information on the subject matter, and it is emphasized that the article is based on the author's personal experience. It should be noted that the opinions expressed in the article are personal and do not in any way bind Danny L. Boone or other individuals mentioned in the texts used for the writing of this article.
If you've ever struggled with using a spoon bender to regulate the dampers in the front of an upright action, you might be interested in learning how to adjust the dampers without having to go through this frustrating process. Although this idea is not original to me, through refining and restating it, I hope to make it even clearer and more accessible to others.
1. Regulate the Capstans
This method will only work when the capstans have been properly adjusted so that the jack is as close to the hammer butt as possible but will still easily return to the rest position under the hammer butt.
2. Align the Dampers to the Strings
Every damper must be aligned with its specific string(s) in every dimension. First, side-to-side: bend the damper wire to center the damper felt directly in front of and in line with its string(s). Second, in-and-out: the top and bottom of each damper should touch its string(s) simultaneously. Bending the damper wire at the top will achieve this.
3. Set the Damper Line
The dampers must now be aligned with each other [in a straight line] with each follow-through on the strings. A damper should follow its string(s) at least 1/16" when the string is pushed toward the soundboard with your finger. This adjustment is made by bending the bottom of the damper wire. If more than a slight bend is needed to achieve this, a bend in the opposite direction at the top of the wire should be made to keep the top and bottom of the felt equally touching the string.
a. Remove the pedal rod from the damper rod and place a felt or rubber wedge between the damper rod and the action rail so that the majority of the dampers just barely touch the strings but do not follow the strings in.
b. Set guide dampers at the end of each section by bending the damper wire at the bottom so that all guide dampers just barely touch the string(s). The first and last damper of each of the following sections should be set as guides: the single-string dampers, the double-string wedge dampers, the tri-chord wedge dampers, and the end damper of each section of flat dampers.
c. Lift the damper rod by hand so that it engages the guide damper levers and remove the rubber or felt wedge. Make sure that all guide dampers lift at precisely the same time. [Note: if the damper rod hook bushings or hangers are loose, you cannot achieve an even lift of all dampers simultaneously.]
d. Now, replace the rubber wedge between the damper rod and the action rail and fix the guide dampers in the position of just barely touching the strings. Remove the action to the workbench and align all remaining damper felts to the guide damper felts, bending at the bottom of the wire with a straight edge. When this is properly done, all dampers will move the same amount when slightly pushed with the straight edge at either the top or bottom of the damper felt.
e. Replace the action and remove the wedge. Check to see that all dampers lift simultaneously when the rod is moved up and down by hand. Further adjustments can be made while the action is in the piano to perfect the damper-line lift. Also, check to be sure all dampers follow their string(s).
4. Regulate the Damper Spoons
Now it's time for the easy part.
a. Place the rubber or felt wedge between the damper rod and action rail again and adjust the dampers so they barely touch the strings.
b. Place another rubber or felt wedge under the hammer rest rail and adjust the hammers in position, half the distance to the strings.
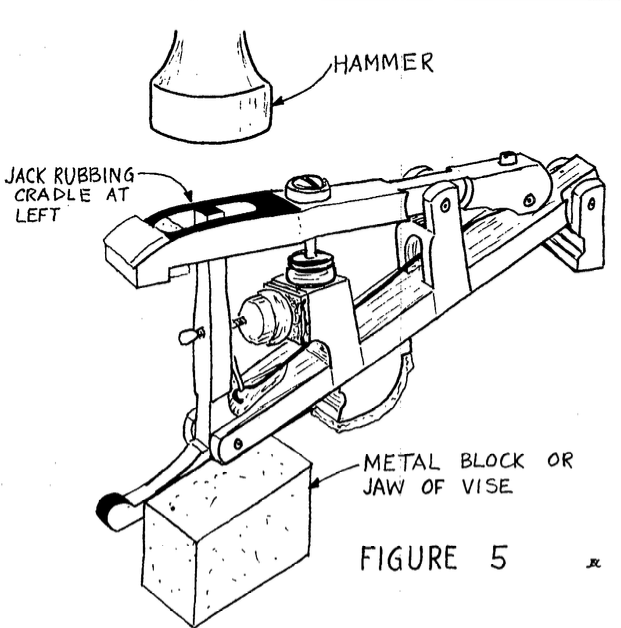
c. Remove the action to the workbench. By lifting the whippen with your finger, you'll move the hammer and damper. The hammer and damper should move simultaneously. This is accomplished by bending the spoons, now easily accessible. Tap the bottom of the whippen to make the hammer and damper move in sync. If the hammer moves, but the damper doesn't, bend the spoon toward the damper and vice versa. Ensure that all spoons are centered in the damper levers and that the damper lever felt isn't completely worn away.
Finally, remove the wedges, screw the action in the piano tightly, and properly adjust the pedal. After completing these steps, you'll have a well-regulated damper system. Believe it or not, you can complete this entire operation in less than an hour.
What's Your Reaction?


