


Suggestions for Reregulating the Vertical Action
The article delves into the essential process of piano maintenance, particularly on vertical pianos. The writer highlights how the "settling in" process is an often-overlooked aspect that can lead to tone and touch distortion. The article provides useful information on the critical maintenance steps required for the vertical piano, which contains approximately 8,000 moving parts. Each step is meticulously explained to guide the reader in identifying and remedying any detectable excess in the piano's tolerances. It is emphasized that manufacturers' specifications vary, and it is crucial to refer to their service manuals.
This article is based on the writings of Georges Peters, a technical expert of the PTG. The text provides valuable and informative information on the subject matter, and it is emphasized that the article is based on the author's personal experience. It should be noted that the opinions expressed in the article are personal and do not in any way bind Georges Peters or other individuals mentioned in the texts used for the writing of this article.
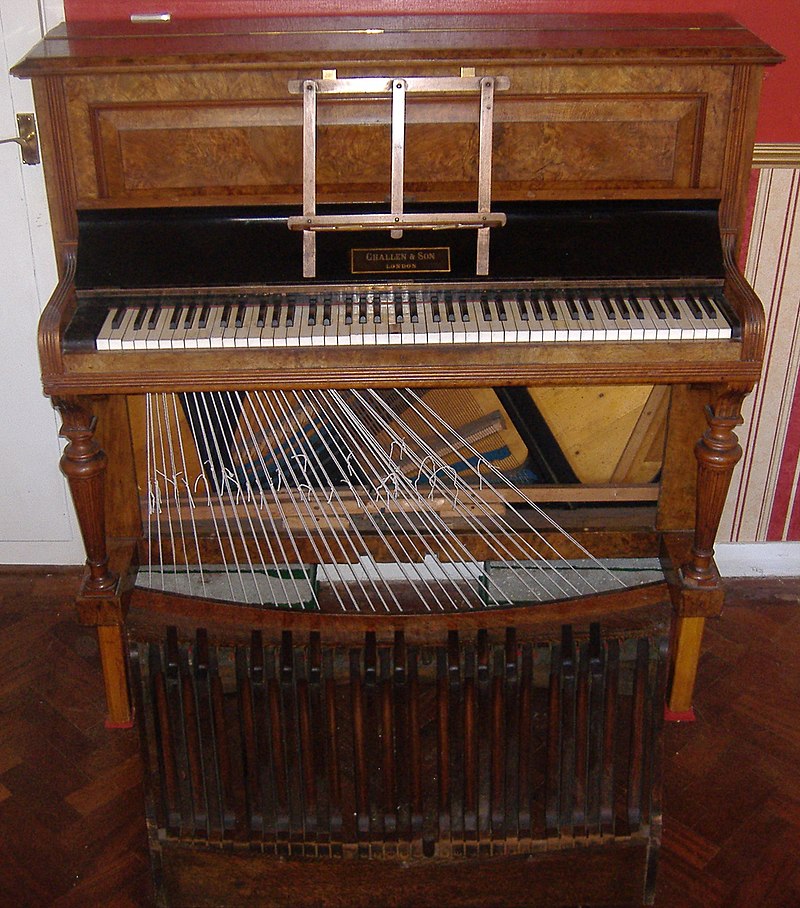
I believe that the "settling in" process of a piano is often overlooked, but it is a crucial aspect to consider. This process occurs in every piano and can lead to distortion of tone and touch. As a result, the pianist may mistakenly blame the piano or tuning for these issues, when in reality, it is a condition caused by a lack of maintenance. In this article, I will discuss the vertical piano, which is the bread-and-butter of our profession, and highlight the importance of proper maintenance. A vertical piano contains approximately 8,000 moving parts that are mathematically integrated, with a built-in tolerance for a limited departure from these ratios. However, if there is a detectable excess in these tolerances, the following remedial steps are suggested.
Note: Manufacturers' specifications vary, so it is recommended that you refer to the piano manufacturers' service manuals.
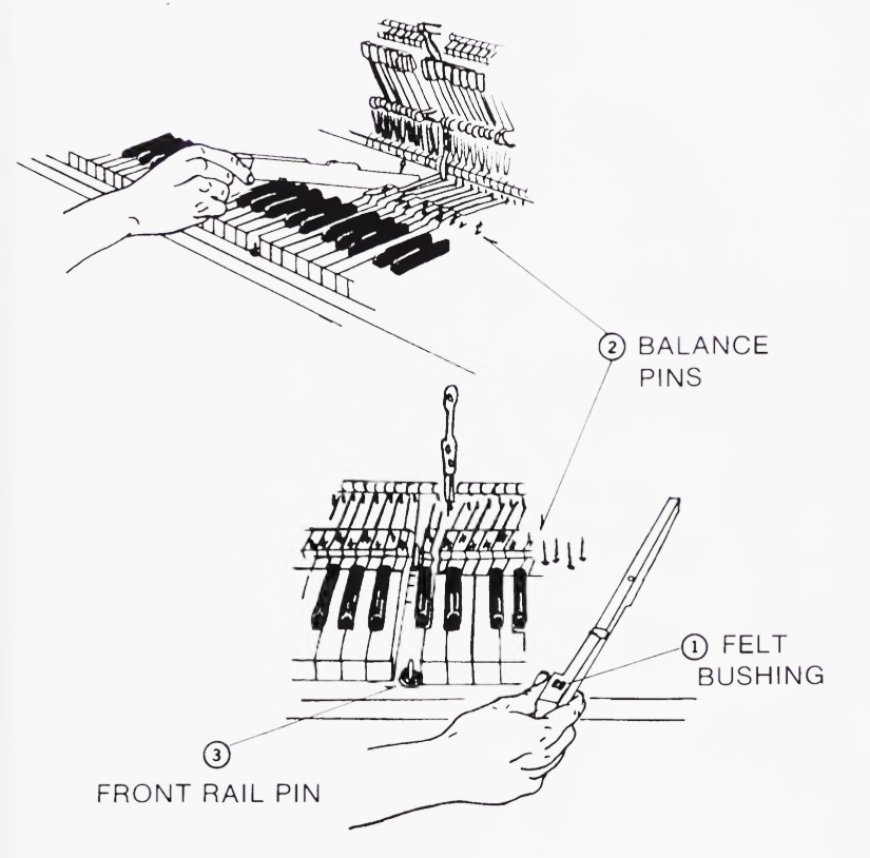
1. Check Keyboard and Keyframe Felt
Inspect the keyboard and keyframe felt for excessive wear or damage, and replace where necessary. Ensure all keys move freely at front and center rail pins. When keys are raised slightly (approximately 1/4 inch) and then released, they should fall back to their normal position instantly. If they do not, use easing pliers with discretion or possibly ream the center pin hole. Rebush and possibly size center pin hole if the keys are too sloppy.
2. Check Action Pinning
Depress the soft pedal and release abruptly to check the hammer rail, which should fall back with the hammers if the butt centers are free. Depress each key all the way and release slowly, holding the damper levers away from the spoons and alleviating any spring tension on the whippens. If a key hangs up or returns slowly, the whippen or jack may be the culprit. Try a lubricant first at the birdseye to ascertain it's not a problem of friction. If this does not work, try a shrinking solution, such as three parts alcohol to one part water (pure alcohol). If it's still reluctant, cut the solution to one and one. The water is the shrinking agent, and the alcohol is the carrier. As a last resort, repin or replace the offending flange.
3. Remove and Inspect Action
Tighten all screws, agitate damper lift rod for squeaks at the lift swings, check damper return springs for squeaks at the grooves, and lubricate where necessary. Replace any broken bridle straps, adjust and tighten regulating rail so that the jack heel centers with the regulating button, file hammers for string cuts if necessary, and check for any damage such as split shanks or flanges.
4. Replace Action
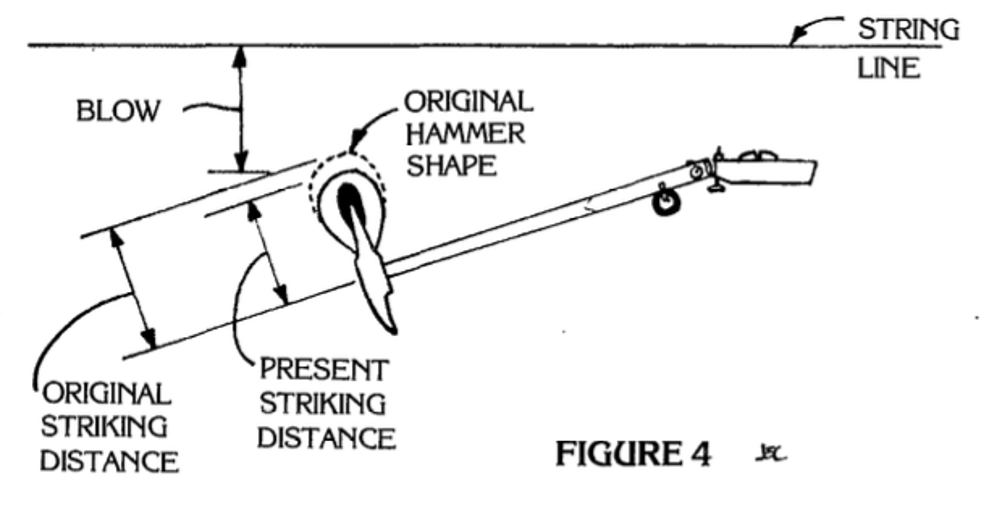
Space hammers and strings, and align hammers to strings. Set blow distance by adjusting hammer rail height with felt spacers at action brackets. Refer to the service manual for specifications.
5. Capstans
Eliminate lost motion between keys and action, and adjust capstans to "just a wink" between jack and hammer butt to ensure easy return to position under butt after key is released. This facilitates fast repetition.
6. Let-off Hammers
Refer to the service manual for specifications. Set the let-off screw at the regulating rail to let off close enough to the string for fast repetition, yet not block the string. The ideal response is not too soon, or it will miss striking on a light blow. Aim for 1/16 inch, or 1/8 inch for added insurance due to fluctuations in humidity.
7. Key Height and Leveling
Again, consult your manual on this specification because the manufacturers don't agree on the distance or the measurement points. Hypothetically, let's say from the keybed to the top of the key covering is 2-3/8 inches. Set your two end keys at this height as guides. Lay a key-level straightedge on top of the keys from end to end and build up any keys that are low by placing shims under the balance rail. Leveling can be adjusted by placing (or removing) punchings on the balance rail pins of the individual keys. Check with a straightedge (or the Davis key leveler, a personal preference). Level sharps in the same manner except set your guides so that the flat surface just in back of the cap is slightly lower than the adjacent natural surface. Squaring can be done by tapping the top of the center rail pin; space them by using your key spacing tool at the front rail pin.
8. Key Depth
Place guides at the end of the bass, middle, and treble sections according to the manufacturer's specifications. Adjust the remaining keys by inserting cardboard shims under the front rail.
9. Back-Checks
Set the guides at the end of each section to the hammer check-off distance recommended by the manufacturer. Bend the rest of the back-checks in or out to form a straight line.
10. Touch Regulation
Strike multiple keys simultaneously with an even blow, and move down the keyboard, comparing the check-off distance to determine if it stays consistent from key to key. If the previous regulatory steps are correct, the only necessary change to correct check-off irregularities will be in the key depth. The key depth must include built-in aftertouch for insurance. (Aftertouch is the additional movement of the key after jack escapement from underneath the hammer butt.) Adjustments can be made at the front rail pin by adding or removing punchings. Use a dip block in this adjustment.
11. Damper Adjustment
The damper should begin lifting when the hammer is halfway to the string. Maladjustment here can be severe. If the damper lifts too soon, it causes the touch to feel heavy, and when at rest, it may not dampen the string. Conversely, if the damper does not leave the string soon enough, it likely will not clear the string sufficiently. Adjustments can be made at the spoon by bending it in or out as required. Make sure that the damper felt is squared with the string. This adjustment can be made by bending the damper wire. Coordination is necessary to ensure that the dampers lift evenly. One way to achieve this is to remove the action from the piano and "gang block" the damper assembly, then adjust while it is evenly suspended. At this point, it is a good idea to voice your dampers, listening for zings or buzzing when in contact with the vibrating string. This is usually the symptom of hardened damper felt and can be corrected by needling, skinning, or filing the layer of felt next to the string. If these steps fail to correct it, replace the felt.
12. Adjust the Trapwork
Adjust the full and bass sustain to include lost motion, preferably around 1/4 inch. This ensures that the damper lift rod will not hold the dampers off the strings while in the rest position. It also compensates for the pianist's foot resting on the pedal. This adjustment can be verified by depressing the string just above the damper; the damper should follow the string at least 1/16 inch. The soft pedal should be adjusted so that the forward motion of the hammer rail will halt the hammer line about halfway to the strings. There should be no lost motion in the soft pedal.
13. Adjust the Bridle Straps
The bridle straps should be adjusted so that they are tight, just short of lifting the whippens when the soft pedal is fully depressed. At this point, the hammers should be halfway to the strings.
14. Finally, go back and double-check everything.
What's Your Reaction?